Tableau Installation and Configuration on Windows


5 min read

1: Tableau Server installation on Windows
Tableau servers can run on a multi-node cluster as well as on virtual machines. Here we will be covering installation on a single-node machine
The minimum hardware requirement for the Tableau server (single node) is:
Processor speed: 8 core, 2.0 GHz or higher processor
32-bit/64-bit architecture: 64-bit
RAM: 32 GB memory
Hard Disk: 50 GB disk space should be available
Operating system requirements :
- The operating systems that support Tableau server installation are as follows: Windows Server 2008 R2, Windows Server 2012, Windows Server 2012 R2, Windows Server 2016, Windows Server 2019, CentOS 7, Ubuntu 16.04 LTS, Red Hat Enterprise Linux (RHEL) 7, Oracle Linux 7
Installation Path: The Tableau server gets installed on the system drives where Windows operating system files also exist. If, by default, the system drive is the C drive, then the installation path will be as follows:
C:\Program Files\Tableau\Tableau Server\packages
C:\ProgramData\Tableau\Tableau Server
Some organizations install Tableau servers in different locations as well. We can provide a location different from the system drive by browsing the install location, which will automatically add \Tableau Server to it and install the files under it.
Let’s now go to installation for version 2023 (2023.2) of Tableau Server.
Step 1: Get the product key for the software using the user ID and password that you must have received while purchasing Tableau. Then go to the Customer Portal and get the product key.
Step 2: Get the admin rights for the computer on which we are installing Tableau software. The developer should be a member of the administrator's group in local users and group management.
Step 3: Get the installation files for the Tableau server. We can download the installation file by visiting Download Tableau Server-Windows
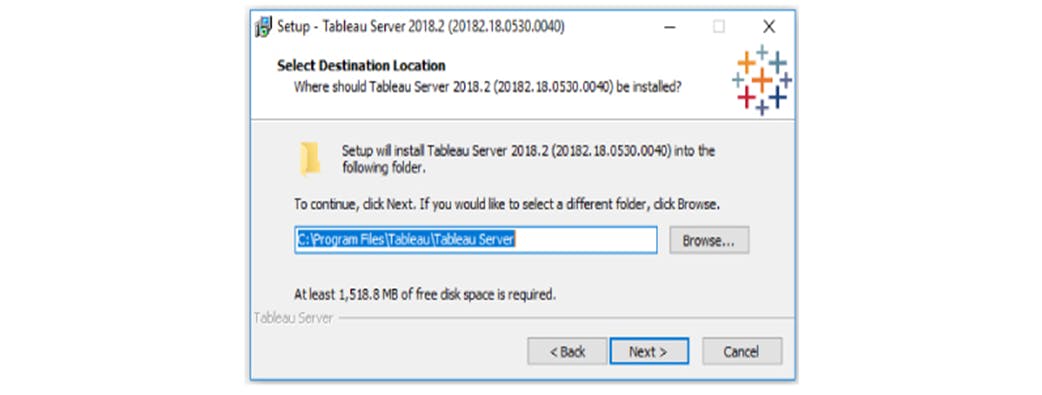
Step 4: Run the installation files with admin rights. The below screen will come up where you can change the installation drive; by default, it will be installed on the system drive.
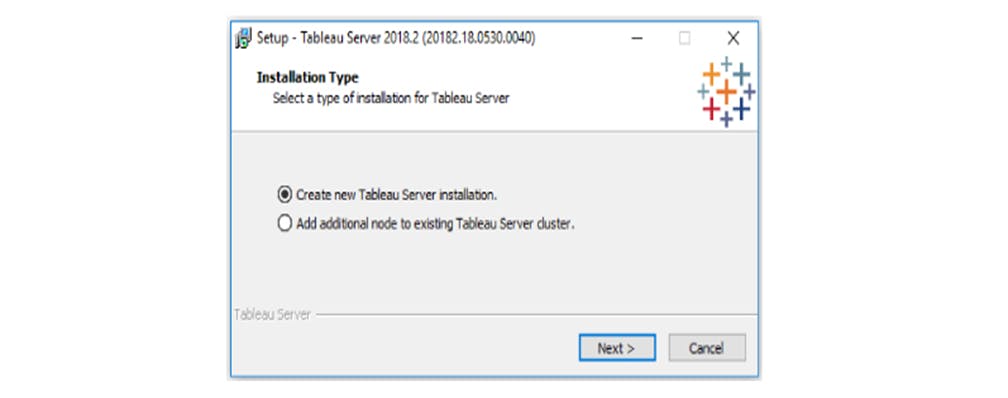
Step 5: Once we click next, the below page will appear where we can choose the installation type
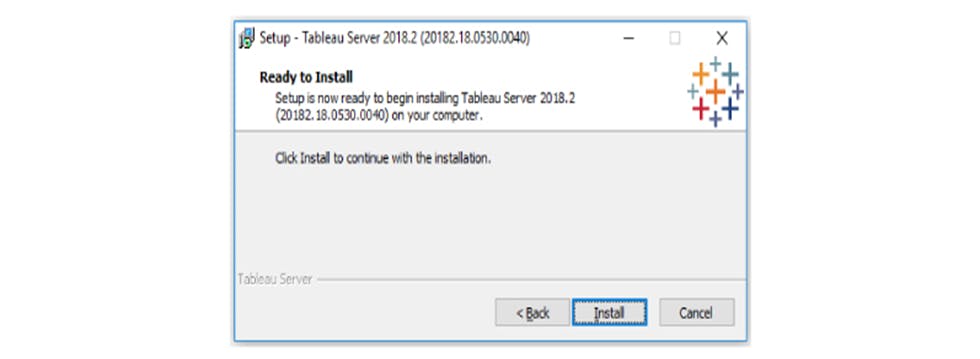
Step 6: After we click on the install button, the installation process will be kicked off, and once the installation is completed, clicking next will start Tableau Service Manager. It may take some time to start TSM.
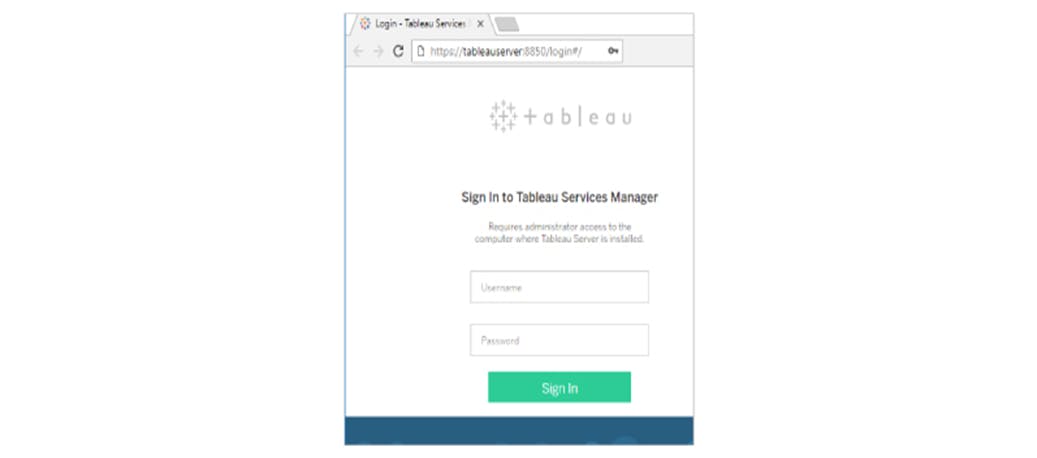
Step 7: Once the TSM process gets launched by the setup process, the below screen will come up. We need to log in using the same admin credential which we have used for running and installing the setup.
Step 8: Once we log in to TSM, it will ask for a product key to activate the Tableau server
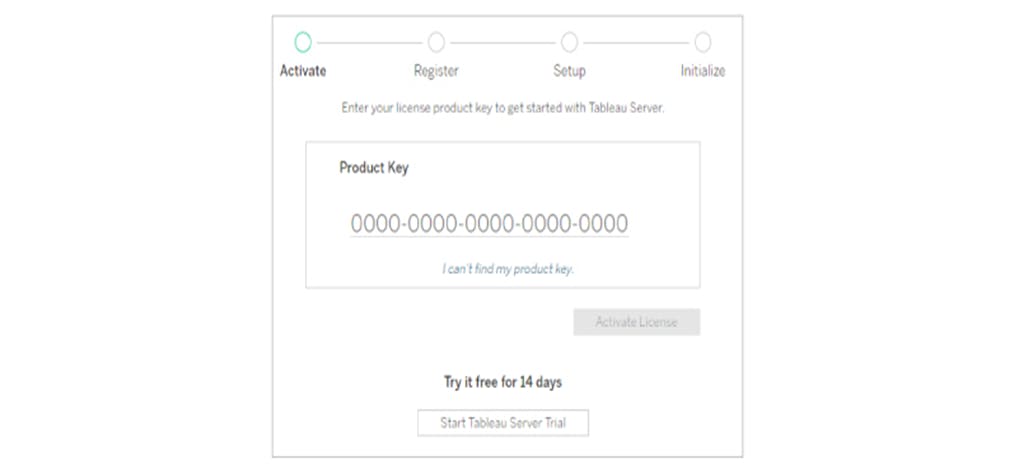
The product key is used to activate both the server and the license type, which can be user-based or core-based. It requires an active internet connection, but there is an alternative way to activate Tableau offline as well. You can read Activate Tableau Offline
Step 9: The next step is configuring the basic settings on the Tableau server after activation and successful registration of the product key. We can set how we want to authenticate users, either in a local or active directory, by setting under which account.
The tableau server should run, setting the default port and whether we want to include a sample workbook or not.
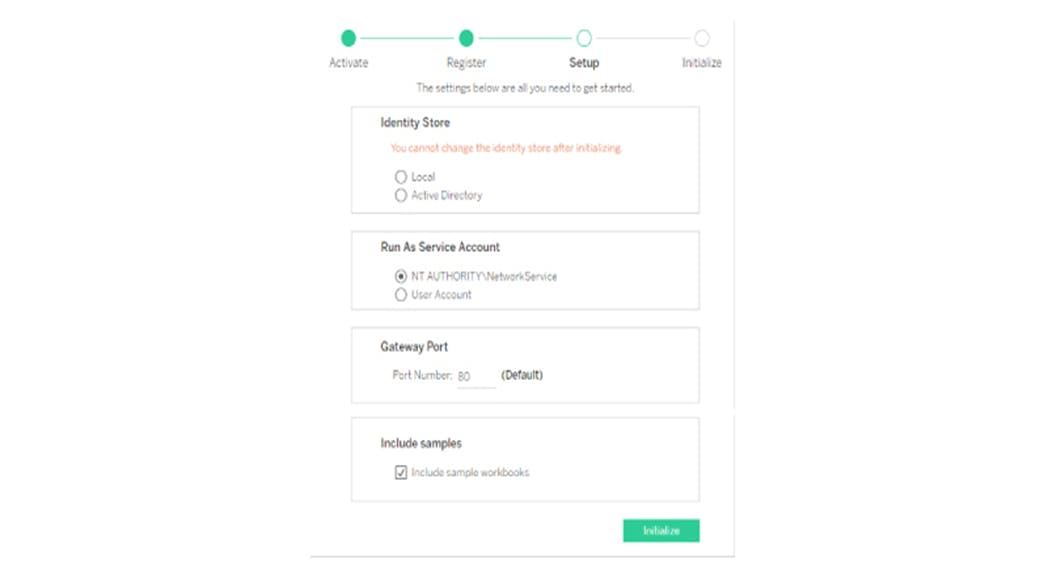
Step 10: Setting the authentication type is very critical to the entire set-up. By default, the authentication type is local. The other option is active directory authentication. If we select an active directory option, then we need to enter a domain name in the fully qualified name, and in the NetBIOS section, we can enter the domain’s nickname

Step 11: We can run the Tableau server either under NT AUTHORITY\NetworkService or a custom service account. We need to provide a domain name with the user name for the custom user account.

Step 12: Setting the default port for the Tableau server: By default, it takes port number 80 if there is no other application running on the same port. If the port is not available, we need to find out which other application has claimed port number 80. Usually, IIS runs on the same port. The IT infrastructure team can help us get a new port if 80 is not available.

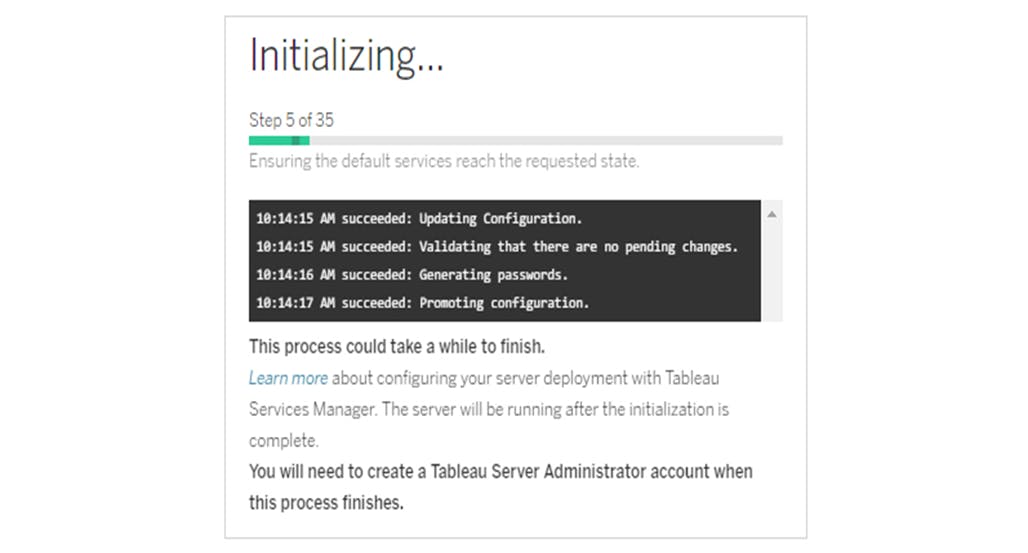
Step 13: Once we click on the initialize button in step 9, the Tableau server will start saving all the configuration settings set in the previous steps
Step 14: Once the initialization is completed, the below screen will appear and clicking on the continue button will take you to the final step, where you need to configure the administrator user for running the Tableau server.
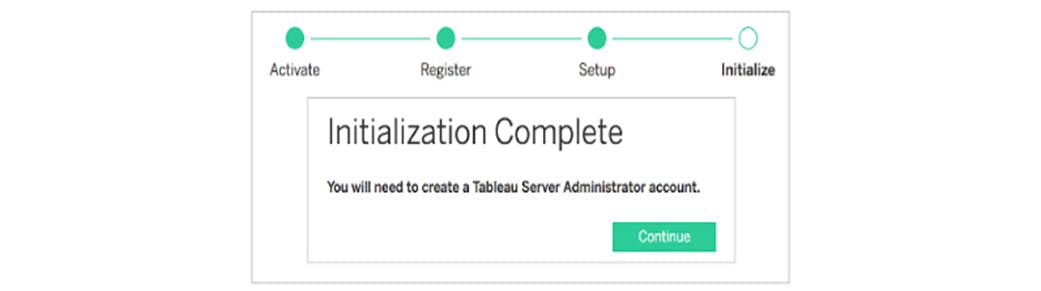
Step 15: The Tableau server set up at the last step launches a browser and opens a page where we need to set the administrator user for the Tableau server. The administrator takes care of all tasks like managing sites, user administration, groups, and project management. Even changing, any configuration setting can be done only by the administrator. In the case of active directory authentication, the administrator must belong to a user in the same directory. For local authentication, we need to provide a username and password. This account is very critical as it provides a single entry point to the Tableau server in case of any issue on the server.
Step 16: Once we are done with the setting of administrator users, we can log in to the Tableau server using the web interface. We can then start publishing the workbook to the server using Tableau Desktop.